Search This Blog

23 September 2015

The Bath House | British-Made Perfumes, Candles And More....

I've just come back from a wonderful weekend in the Lake District celebrating the marriage of one of my oldest friends. Whilst there I was lucky enough to have chance to explore the area a little and wandering through the pretty town of Bowness on the edge of Lake Windermere, I stumbled upon the Bath House and was immediately impressed. Think Jo Malone, but less spendy.


The Bath House review

With the C word coming up (shhh, I'm in denial that it's summer no longer) I wanted to blog about it because their beautiful British made all-natural products have got 'gift' written all over them. Some natural beauty products can be a bit worthy. You know it may be doing your skin good, but it just doesn't feel great to use. Not here. The entire range is luxurious with lovely packaging and is just the right side of affordable. How it's managed to escape my notice before now is beyond me.

The Bath House review

Their perfumes deserve a special mention. Mixed in amongst classic fragrance combinations are some unique scents that are perfect if you want a scent that's a little bit different. My boyfriend described Patchouli and Black Pepper as something Boadecia would wear - all spicy and sensual. White Tea and Rose bears more than a passing resemblance to Chloe's signature fragrance. This offering is a little lighter perhaps, but an excellent dupe at a fraction of the price. Damask Rose and Violet is the kind of traditional rose scent I love. Slightly grannyish and super feminine yet somehow still contemporary. White Cedar and Pear - my favourite - is perfectly autumnal and manages to be both fresh and warm at the same time.

The Bath House review

Wear time on the two I tried (Patchouli and Black Pepper and White Cedar and Pear) was excellent, with the scent still lingering an impressive 12 hours later. At £28 for a 50ml bottle compared with £42 for a 30ml Jo Malone cologne, they offer excellent value for money and I know where I'll be spending my pennies in future. Bath House also do a 12ml handbag sized version giving you the chance to try a scent without committing to the large bottle. These would make perfect gifts.

The Bath House review

Other things to look out for are the beautiful bath oils and bath salts. Who wouldn't want to display these in their bathrooms then indulge in a soak after a long day? I've also got my eye on the candles which smelt amazing and promise to scent a room without even being lit. The soap and lip balms would make perfect stocking fillers too.

The Bowness store is sensory heaven and there are four other stores in the North West. For most people though, the Bath House online shop will be the place to look. If you're put off by buying fragrance online, their descriptions of the scents are clear and accurate, and there's free delivery on orders over £40. 

I'm so pleased to have found this store. High quality, chemical-free, British made products in gorgeous packaging to suit all ages and tastes, I'm seriously impressed. My challenge will be parting with the gifts I buy for other people and not keeping them all to myself. 

www.thebathhouseshop.com.

7 July 2015

Going For The Chop At A Salon With A Difference

Kojo&Lee bob

After years of having long blonde hair, I've finally gone for the chop. I dabbled with a darker colour for a few months recently, but it did nothing for me (I looked a bit dead). That change didn't work out but I was getting bored of having the same style and was ready for something different. When I was younger I was really adventurous with my hair and thought nothing of switching things up regularly. In the space of a few years I had a blonde crop, a red bob and even waist length braids. Then I found a style I liked, and stuck with it. FOR YEARS. Yawn. 

So yeah, the other day I went for the chop.

After lots of recommendations from friends, I paid a visit to Kojo&Lee in Sheffield city centre. It's a hidden gem (literally), that has taken the traditional salon approach and turned it on its head. Currently there's no sign above the innocuous doorway, no sinks for hair washing and no colourist. It nails the minimalist shabby chic vibe, with gilded mirrors and a dark grey glazed cabinet adding a hint of faded glamour to bare walls and unsanded floorboards.


Kojo&Lee bob

Nikki, a Toni and Guy trained stylist, set it up a few years ago and quickly realized that there was a market for a salon with a difference. Sometimes people find traditional salons intimidating, sometimes they're out of people's budgets. For me personally, I'm so over handing over large sums of money for a mediocre experience and a mediocre style. 

Kojo&Lee has taken off by word of mouth alone and that tells me all I need to know. People are obviously loving what Nikki offers. What struck me more than anything was that she really listened to me - what I wanted and, importantly, what I didn't want - and seemed to pay real care and attention to every snip. She styled it with my wavy hair type in mind, when so many other stylists try to straighten the life out of it. I'm thrilled with the finished result.

I didn't really know what to expect when I went in, but my visit to Kojo&Lee was honestly one of the most positive hairdressing experiences I've had. The best bit? It set me back only £20.00. Unique, affordable, quality hairdressing - what more can you ask for? 

Find out more about Kojo&Lee, including plans to add sinks and hire an experienced colourist at www.facebook.com/kojoandlee

29 June 2015

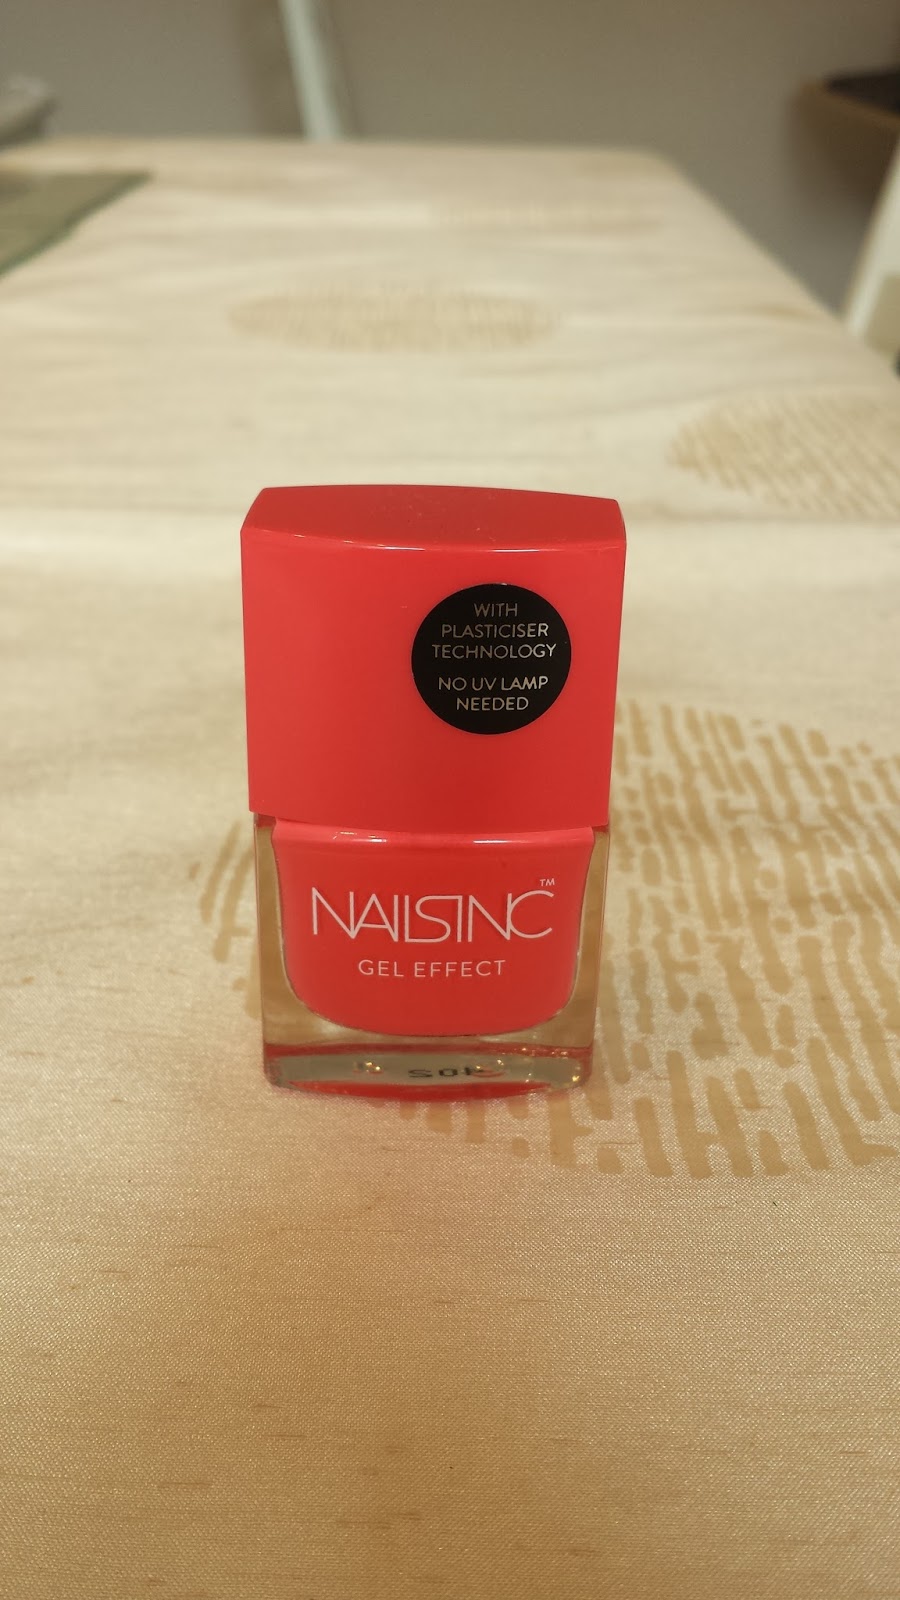
The Perfect Summer Coral: Nails Inc Kensington Passage Gel Effect Nail Polish

I'm a big fan of bright colours on my nails and cheery coral is my favourite. It somehow has the effect of looking like you've made a bit of effort without looking as try hard as bright red.

Nails Inc Kensington Passage Gel Effect Nail Polish

Nails Inc Gel Effect Nail Polish in Kensington Passage is the perfect coral for summer. It's a bright, bold go-with-anything shade that is supposed to mimic the effect of gel polish. I've always been impressed with how gel polish dries instantly and remains chip-free until you remove it. But it starts to look dodgy as soon as there's a significant amount of regrowth (after around 10 days) and I have neither the funds, time or inclination to be visiting a nail salon every couple of weeks to maintain it. Don't even get me started on the laborious removal process, which absolutely wrecks your nails.

Nails Inc Kensington Passage Gel Effect Nail Polish

So a polish that gives the same effect but can be used at home and taken off with standard nail varnish remover sounds like a good idea to me. 

Nails Inc Kensington Passage Gel Effect Nail Polish

I used a base coat on my finger nails which provided a smooth base under which to apply the colour and I was seriously impressed with the pigment and application. This is just one coat of colour, whereas normally I'd apply two to get this level of coverage. The end result is certainly glossy, but not quite as high-sheen as an actual gel polish. The colour lasted a good few days before it started to chip. This picture was taken four days in - as you can see, there are a few small chips, but I'm pretty impressed considering it's only one application with no top coat.

Nails Inc Kensington Passage Gel Effect Nail Polish

I didn't bother with a base coat on my toes, and things didn't fair quite so well. The application was a little streaky and I definitely needed two coats to get a decent coverage. The colour lasted well though, and four days in there are no chips and the colour is still looking glossy.

I love the colour of Kensington Passage and will be wearing it all summer long, but I'll definitely be applying a base coat underneath to get the best effect.

Nails Inc Kensington Passage Gel Effect Nail Polish is £15.00 and can be bought HERE

16 June 2015

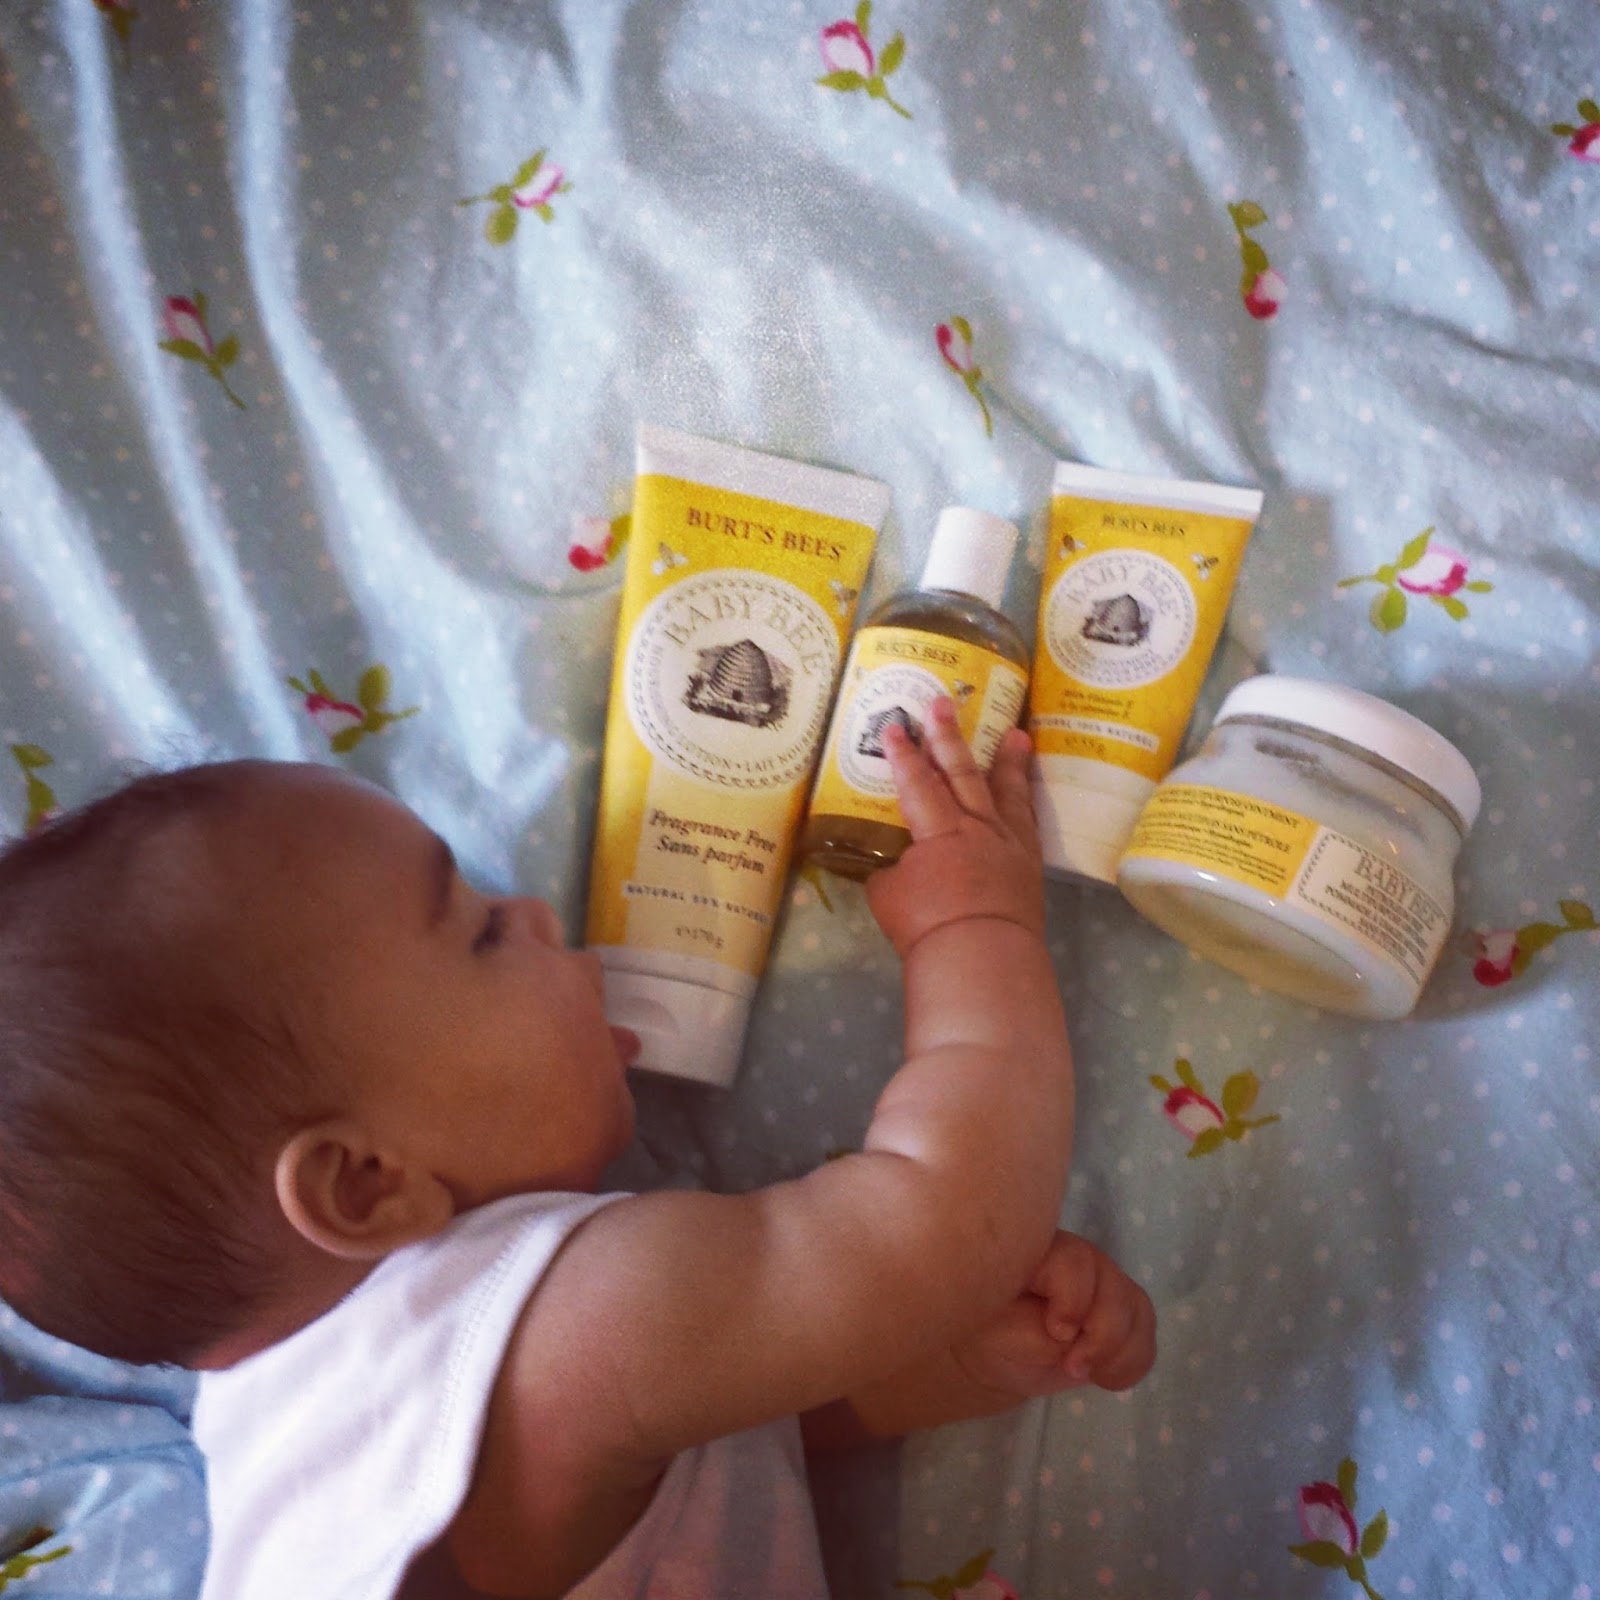
Naturally Good: The Burt’s Bees Baby Bee Range

Burt's Bees Baby Bee

Burt's Bees Baby Bee

The Burt’s Bees Baby Bee range is completely natural, so there are no nasties in there to irritate teeny skin. You’d be amazed how many popular baby brands pump their products full of well-known irritants. Ingredients like Sodium Laureth Sulphate(SLS) can cause irritation to adults, so it’s no wonder it can affect a baby’s delicate skin. I’ve been keen to use only natural stuff on my daughter since she was born just over six months ago, and I absolutely love everything I’ve tried from the Burt’s Bees baby range. Undoubtedly it’s more pricey than the likes of Johnson’s, but for me, the quality of the ingredients and the fact that you only need small amounts each use make it good value. And whilst money is tight at the moment (hello Statutory Maternity Pay!), I would rather pay more to look after my baby’s delicate skin. 

Of the many things I’ve learnt since having a baby, it is that new cracks and crevices seemingly appear on a daily basis. Just when you think you’ve got your bathing and drying routine down, a new crevice comes along to remind you that you're not as on top of things as you should be. When Iris was a few weeks old, she smelt of what can only be described as festering, sour cheese for a good few hours before I realised that milk had been collecting under her armpit. Not only did the poor girl stink to high heaven, she was left with a horrible red sore there too. I applied the Burt’s Bees Baby Bee Diaper Ointment (after a good wash) and the next morning, the redness was gone. So whilst the name suggests it’s designed for use on bottoms, I find it works really well elsewhere too and it has successfully soothed Iris' dribbly chin and airless neck rolls. It’s basically a natural version of Sudocrem and it smells lovely – there’s definitely a hint of lavender (a natural antiseptic) in there. My only gripe is that the cream is quite thick and getting it out of the tube is a bit tricky – a pot would be much better. Other than that (and the annoying Americanised name), it’s a gem of a product which is well worth having in your baby kit.

The Burt’s Bees Baby Bee Multi-Purpose Ointment is an all-natural alternative to Vaseline which will appeal to parents who want to avoid using petroleum-based products on their little'uns. I've been really impressed with this stuff. Following an horrendous case of nappy rash at two weeks old, leaving Iris’ poor little bottom with bleeding, open sores, I’ve used this after every change and she’s never had nappy rash since. On holiday recently, I forgot to take it, and lo and behold, the nappy rash reappeared. Whereas Vaseline creates a protective barrier to prevent moisture from a wet nappy penetrating the skin, this stuff has the added benefit of providing nourishment too. Whilst I have a small person to look after, I will never not be without it.

I bathe Iris every couple of days and use a small amount of the Burt’s Bees Baby Bee Shampoo and Body Wash (not pictured) to cleanse her hair and body. It’s really gentle and hasn’t stung on the few occasions it’s got into her eyes when rinsing her hair. I’ve been using it for six months and I’m only a quarter of the way through the bottle.

Iris sometimes gets dry skin on her cheeks and around her eyes and I’ve found that the Fragrance Free Nourishing Lotion from this range really helps to keep it at bay. I apply a small amount (saying “cheeky cheeky cheeky chops!” whilst doing so is not compulsory). It sinks in really quickly and leaves her skin really well moisturised and feeling nourished. This would be a fantastic choice for adults with sensitive skin too. I’m still on bottle number one despite using it every day for six months.

Lastly, and possibly my favourite from the range, is the Burt’s Bees Baby Bee Nourishing Baby Oil. I got this in a gift set but didn’t try it until one of the mums I’d met at a baby group recommended it. I quickly grew to love it and now use it all over Iris’ body after each bath. It smells AMAZING, sinks in quickly and leaves her skin beautifully soft. It’s also great for use during Baby Massage.

There’s currently a third off the Burt’s Bees Baby Bee range at Boots

29 May 2015

Clarins Radiance-Plus Golden Glow Booster | The Fake Tan For People Who Don't Like Fake Tan

The Beauty Scriptures

Me and fake tan do not get on. On the few occasions I've tried it over the years, it's ended up patchy, orange, or both. I once sported feet that David Dickinson would be proud of after a particularly over-zealous encounter with a bottle of St Tropez and they remained orange for weeks after the rest of my tan(go) had faded. Not a good look! 

Perhaps it's because my skin is dry and very pale, but I've not fared much better with gradual tanners either, which, despite promising to be simpler and more natural-looking, still go patchy. And don't even get me started on the lingering smell of biscuits that seems to be a necessary tanning evil.

Given all that, I decided a few years ago to embrace the pale and interesting look. I would much rather be deathly white than orange any day of the week. But summer is fast approaching, I have a holiday coming up and, frankly, I just feel more confident getting my legs out when they're not so milk bottle.

So when I heard about the new Radiance-Plus Golden Glow Booster from Clarins I was intrigued. It's basically a concentrated vial of gradual self-tan that you add to your usual moisturiser. Clarins recommend adding 4-6 drops per 'zone' and the fact that it's totally customisable really appealed to me. You're in control, so you can simply add more or less depending on how dark (or not, as the case may be) you want the end result to look.


The Beauty Scriptures


I broke my body down into arms and chest; thighs and bum; knees, calves and feet, missing out my tummy because it's never on show. With my regular body cream - a Body Shop Body Butter - at the ready, I added 4 drops of tan to the amount of cream I'd usually use to cover each of those areas. I then mixed the two together in my hands and applied as normal i.e slapping it on in a haphazard fashion until it's vaguely rubbed in. It was super easy and faff-free.


The Beauty Scriptures


Interestingly, Clarins also offer a version of this product for the face, but you get half the quantity (15ml as opposed to 30ml) for only a few pounds less. I questioned what was the difference between the two and was advised that the body version is slightly darker. So I simply added 2 drops instead of the recommended 4-6 to my usual amount of moisturiser to cover my face and neck.


The Beauty Scriptures


Over the course of a few hours, a subtle colour developed. On my very pale skin, it was noticeable enough to minimise the milk bottle effect on my legs and give my face a healthy glow, but it was not so noticeable as to look fake.

When I've used fake tan in the past, I've always had dodgy results around my wrist, elbows and ankles where the skin is dryer. Not so here. I was left with an even coating of natural-looking colour. If you're darker skinned, I'd say you could easily apply 6 drops per area without it looking too dark. Alas, there was a still faint whiff of Eau de Biscuit once the colour started to emerge, but it was not as bad as other tanning products I've tried.

I used it again a couple of days later and was even more impressed second time around. The colour on both my face and body was really natural looking. No-one else would be able to tell I was wearing fake tan, I'm sure of it, but I just looked that little bit healthier. That's exactly the effect I wanted.

Overall, I think this is an excellent buy. It's certainly the best self-tan I've ever tried and is brilliant for dipping your pasty toe in the tanning water if you're an orange-phobe like me. The 30ml body version worked perfectly well on the face, so I'd suggest opting for that rather than getting the smaller version. At around the £23 mark, it's not the cheapest gradual tanner on the market, but the bottle should last a while and the quality of the results make it good value for money.

Buy the Clarins Radiance-Plus Golden Glow Booster HERE

Happy tanning!

19 January 2015

The perfect lip balm? Lovely Cosmetics Peppermint Lip Conditioner review

Lovely Cosmetics Peppermint Lip Conditioner Review

I recently worked out that not a day has passed since 1994 in which I've not applied lip balm, so it's fair to say I'm well and truly addicted. 

Over the years I've tried pretty much every pot and tube of the stuff going and have settled on this Blistex offering for quite some time now. However, it's petroleum-heavy and I've been increasingly trying to remove petroleum and mineral oil-based products from my skincare regime. A by-product of the oil industry, those ingredients are quite simply an inexpensive way for beauty companies to bulk out their cosmetics and despite popular belief, they are great at keeping moisture out (hence why cross-channel swimmers coat themselves in it!) but aren't actually very good at imparting moisture into the skin. Lips don't have any oil-producing glands, so they need all the help they can get.

What with the wintery weather we've been experiencing recently, my lips have been particularly parched so I was excited to try this Peppermint Lip Conditioner by Sheffield-based artisan company, Lovely Cosmetics, which I was given as a gift by my boyfriend for Christmas. 

I love the ethos of Lovely Cosmetics, whose aim is to make small-scale, natural, cruelty-free skincare. The vintage-style packaging is cute, though the chunky pot is not particularly transportable if, like me, you always like to have a lip balm in your handbag. The Peppermint scent is pleasant and not at all cloying or overpowering. 

As for the balm itself, it's jam-packed full of skin-loving oils - all of which are clearly listed on the pot and on the Lovely Cosmetics website, so you know exactly what you're putting on your skin. If only some of the big beauty players were so transparent about their ingredients!

The Peppermint Lip Conditioner contains:
Persea gratissima (avocado) oil, butyrospermum parkii (shea) butter, cera alba (beeswax), theobroma cacao (cocoa) butter, mentha piperita (peppermint) essential oil, tocopherol (vitamin e) oil
Being oil based, the balm feels quite different to a traditional lip balm. Solid in the pot, it needs to be warmed on the finger before applying on the lips. Once on, it feels immediately nourishing. I can really see how it's earned its 'conditioner' moniker. 

One of my gripes with many lip balms is that they sink in too quickly and require constant replication. This one doesn't. Applied at night, there's still a trace left next morning and lips feel noticeably softer and more moisturised. It's also great for applying before lipstick to create a smooth base. 

This is one of my favourite finds of the last year and I'm a total convert - I've not used my Blistex balm since getting it and I can't see me ever going back. 

The Peppermint Lip Conditioner is £5 and can be bought online here.

If you're Sheffield-based, lots of the city's indie shops are stockists and I'd encourage you to check them out as it's a lovely brand (sorry, not sorry) and worth giving a go.

24 December 2014

Mummy Christmas!

Mummy Christmas

Well, it's Christmas eve and I currently have a snoozing baby lying on me as I type. Iris was born three weeks ago and nothing could have prepared me for what a whirlwind having a baby would be - it's been a successful day if I find the time to have a piece of toast, never mind fit a beauty regime into my day - but Iris is just perfect and I'm totally in love with her.

I want to take this opportunity to say thank you to everyone who has read my blog over the past year - I've loved writing it and hearing from readers. I'm probably not going to be posting quite so much for a while as I focus on being a Mum, but I'll check in every now and again with beauty news or inspiration.

Have a wonderful Christmas x

26 November 2014

Loving my baby body

When I was recently asked to be photographed for a pregnancy photoshoot, I didn’t really give it much thought before accepting. It was lovely to be asked, and I figured it would be a nice way to capture these last few weeks of my pregnancy.

Loving my baby body

It was only the day before the shoot that I got to thinking about how much my body has changed over the past few months and how I feel about it.

Loving my baby body

Physically, I can’t say I’ve loved being pregnant. I’ve struggled with my energy levels throughout, become incredibly clumsy, and found lugging my expanding bump around logistically challenging. Creating a nightly pillow fort in bed to support said bump sounds way more fun than it actually is.

Loving my baby body

But I’ve also loved seeing my bump grow, knowing that every week it means the baby is growing too and that we’re that little bit closer to meeting her. 


Loving my baby body

Frequent visits to the work biscuit tin and a slightly obsessive penchant for ice-cream aside, I’ve eaten well. My priority has been to stay healthy and to give the baby all the nutrients she needs, so I've not given much thought to my figure. Having said that, I’ve been lucky not to have put much weight on. Over the years, my weight has fluctuated and at 39 weeks pregnant, I’m still lighter than when I was at my heaviest.


Loving my baby body

I’ve always tried to maintain a healthy attitude to food and body image, even when I was bigger and I worry about raising a girl in an increasingly weight-obsessed world. That's a whole other blog post though.


Loving my baby body

Anyway, the day before the shoot, I started to think about what to wear. Admittedly my options were rather limited. I’ve bought as few maternity clothes as possible with the view that I’ll only be wearing them for a short time and my money can be better spent elsewhere. (You know, like on the million and one things we need for the baby.) And then I thought about actually getting the bump OUT. 


Loving my baby body

There’s no way I would have considered being photographed in my undies before. It's a bit, well, self-indulgent and vain, right? But I realised that I feel confident about my pregnancy body – stretch marks, cellulite and all and this was an opportunity to capture this special time on camera.


Loving my baby body

So I dug out my best underwear (literally - it’s not seen the light of day for months) and got my kit off. Photographer Shelley was lovely and I felt totally comfortable with her. If you could see me now, typing away wearing joggers and my boyfriend's biggest jumper because it's the only one in the house that fits me, I couldn't look more different from the way I do in these pictures. They certainly aren't representative of my day-to-day pregnancy look, but I feel glamorous and sexy. I love the resulting shots.

Loving my baby body

Over the coming months, my body is sure to change even more. I can’t predict how I’ll feel about it when I’m left with the remains of a bump that once was, but I know I'll always be happy that I took the opportunity to flaunt it whilst I still had it.

What do you think? Would you have the confidence to get your kit off on camera, pregnant or not? 

Photography: Shelley Richmond
Shelley is currently offering mini-portrait photo shoots for just £50 - perfect for growing bumps or babies. 

Location: Brocco on the Park Hotel

30 October 2014

Glamorous and Gory Halloween | The Dead Flapper Girl

Glamorous and Gory Halloween Costume | The Dead Flapper Girl
Dead Flapper Girl
Just in time for Halloween, I thought I'd share some fancy dress inspiration in the form of my costume last year: The Dead Flapper Girl. With the help of loo roll (yes, really), eyelash glue, fake blood and LOTS of eyeshadow, I created one of my favourite ever looks. I loved having the opportunity to get creative with my make-up bag.

The main focus of the look is the open wounds, and believe it or not, that's where the loo roll comes in! When applied with eyelash glue and coloured in using a combination of red lipstick, black eyeshadow and fake blood, it gives a surprisingly realistic effect. This Glamorous Zombie tutorial by Doll Face Ree gives a good explanation for how to achieve those type of wounds.

Glamorous and Gory Halloween Costume | The Dead Flapper Girl
Loo roll, eyelash glue and fake blood are used to create surprisingly realistic wounds
Classic 1920s make-up - all purple smokey eyes and red lips - worked as the perfect contrast with all that gore. To really up the halloween ante, I used matte textured sludgy-coloured eyeshadow to create a sunken effect under the eyes and in the cheekbones.

Glamorous and Gory Halloween Costume | The Dead Flapper Girl
Time-consuming but worth it: A giant crimper helped to create 1920s finger waves
To create the 1920s finger waves, the Babyliss Pro Triple Barrel Waver worked a treat. It took AGES to work my way through my long hair, but I was thrilled with the finished result after pinning it up to create a faux-bob. 

So there's my favourite halloween look - what's yours?

28 October 2014

Mojito Loves | Clarins Instant Concealer

Clarins Instant Concealer

Clarins Instant Concealer

Clarins Instant Concealer

Clarins Instant Concealer

When I recently had enough Boots points for a beauty splurge, I decided to give the Clarins Instant Concealer a go after reading good reviews about it. I'm really glad I did - it was love at first use.

Concealer tends to have two very different functions – offering either coverage or brightening effects – and I’ve yet to find one that manages to do both very successfully. All too often, those that offer a decent level of coverage to disguise under-eye luggage or spots can be very drying. Brightening concealers, such as the infamous YSL Touche Eclat, don't provide any coverage at all. 

One of my main complexion issues is dark circles and dryness under the eyes. When combined with pink eyelids, this has the effect of making me look constantly tired. At 35 weeks pregnant, I am constantly tired, but it doesn’t mean I want to look it! I also have red thread veins around the side of my nose and redness on my cheeks and chin, so concealer is one of the products I never leave home without.

Clarins Instant Concealer: Texture and application

With its light texture, a medium buildable coverage, and light-reflecting particles, the Clarins Instant Concealer is pretty much the perfect consistency. Its creamy formula is a dream to apply. A little goes a long way – as you can see in the image above, a small amount covered all of my problem areas. I find it applies best with the ring finger to smooth it on and then pat it in. Best of all, it doesn’t go cakey – even on my dry skin and when reapplied throughout the day.

Clarins Instant Concealer: In action

It’s being marketed specifically as an under-eye concealer and it really does conceal dark circles and brighten this area very well. I’ve also been using it to cover imperfections elsewhere on my face and it does an equally good job there, concealing the thread veins around my nose and the redness on my cheeks and chin, whilst still looking natural. I’m seriously impressed.

Here it is on the right side of my face (the left as you look at it) - under the eyes, on the eyelids, around the nose and on the cheeks and chin - I look so much fresher and all the redness has been well concealed.

Clarins Instant Concealer

Clarins Instant Concealer: Should you buy it?

There are currently only three shades in the range so it’s not ideal if you have very dark skin. I have 01 which is a perfect match for my pale complexion. At £21.00, it’s an investment product but one which really delivers for me. I would definitely purchase it again – even if I don’t have enough Boots points to foot the bill next time!
 

You can buy the Clarins Instant Concealer HERE.

13 October 2014

Review | Rimmel Sun Shimmer Instant Tan BB Skin Perfector

Rimmel Sun Shimmer Instant Tan BB Skin Perfector Review
Rimmel Sun Shimmer Instant Tan BB Skin Perfector in Light Matte

Rimmel Sun Shimmer Instant Tan BB Skin Perfector Review
A 20p sized blob applied on a tanning mitt created a natural-looking colour.

Rimmel Sun Shimmer Instant Tan BB Skin Perfector Rewview
Before and after: milk bottle legs, be gone with you!

Autumn’s well and truly here and if you’re anything like me, you’ll be rejoicing at the fact that you can finally start wearing the opaque black tights that have been banished to the back of the drawer all summer. But sometimes, even as the temperature drops, black tights don’t look quite right and bare legs have to make an appearance. 

Whilst I try and rock the pale and tragic interesting look most of the time, I have milk bottles where my legs should be and it’s just a fact of life that they look better with a little bit of colour. I’m not averse to a pair of very sheer nude tights with the right outfit, but the ever-increasing baby bump means my existing pairs are currently redundant. Similarly, me and fake tan have a long and chequered history, because frankly, I can’t be arsed with the faff of it. 

That’s why I was intrigued by the promises being made by the Rimmel Sun Shimmer Instant Tan BB Skin Perfector* in Light Matte. It’s claim to offer 24 hours of natural looking matte tan which can simply be washed off appealed to my lazy sensibilities. As with most fake tan, good preparation and a bit of patience make all the difference, so exfoliating and moisturising beforehand will create a smooth base. I did this the night before to save time on the day. Although technically a wash-off product, I didn’t trust it enough not to end up with orange palms, so I applied it with a mitt which was far less messy.

My impatience got the better of me the first couple of times I used it and there were some streaks at the back of my calves which didn’t look great. But this time I made sure I spent plenty of time rubbing it in – when I thought I’d blended it enough, I blended some more and it seemed to do the trick: I achieved a natural-looking tan in less than 10 minutes. If you prefer a darker shade, you could easily get a more intense colour by using more product. As it was, a 20p sized blob was enough to do each of my pale legs.

Overall, I was impressed with the Rimmel Sun Shimmer Instant Tan BB Skin Perfector. It’s a great value product which is ideal for fake-tan-phobes like myself, or for time-pressed tan fans. I suspect I’ll get quite a bit of use out of it in the Spring and Summer. 

Have you tried it yet? Or are there any other wash-off tans which you can recommend? 

Rimmel Sun Shimmer Instant Tan BB Skin Perfector | £6.99
 

*I’m completely ignoring the BB claim as, frankly, I’m not convinced it’s anything other than marketing speak.

3 October 2014

Berry Nice: Bourjois Rouge Edition Velvet Lip Colour in 08 Grand Cru

Bourjois Rouge Edition Velvet Lip Colour in 08 Grand Cru
7am: Bold lips from the Bourjois Rouge Edition Velvet Lip Colour in 08 Grand Cru

Bourjois Rouge Edition Velvet Lip Colour in 08 Grand Cru
5pm: Excellent longevity from this matte lip product, albeit with a little bit of dryness in the centre of the lips

Bourjois Rouge Edition Velvet Lip Colour in 08 Grand Cru

Bourjois Rouge Edition Velvet Lip Colour in 08 Grand Cru

I don’t know about you, but with the onset of Autumn I find myself wanting to mix things up in the make-up department. The bright corals and pinks that I’ve worn all summer no longer appeal. I prefer something warmer. Something more, well, autumnal. Enter the berry lip. This one from Bourjois – their Rouge Edition Velvet Lip Colour in 08 Grand Cru – sure does pack a real punch. Forget the whole subtle “I’ve just been eating cherries and they’ve stained my lips” look. This product offers amazing colour pay-off which is not for the faint-hearted.
 

So what’s good about it?
 

It’s an incredibly pigmented matte product. Generally, I find matte textures too drying but this one fares pretty well, even on my parched lips. 

Now let’s just take a moment to admire the gorgeous colour. The texture may not be up everyone's street but the colour itself is actually very wearable and would suit most skin tones. The two images above were taken at different times of the day - it's showing a little more pink in the lower image when the light wasn't as good, but generally I'd describe it as a red-toned berry shade. It’s perfect for the upcoming season and is a great alternative to classic red for lovers of a bold lip.
 
The best thing about this product for me though is the very impressive staying power. Once applied, give it a minute or so to set then you’re good to go for the rest of the day. I applied just one layer at 7am and it survived a full day at work with back to back meetings, breakfast, lunch and innumerable snacks in between. Normally, I would top-up my lip colour at lunch, but I didn’t on this occasion to give it a really good road-test and it fared very well. You can see in the above image that my lips do look dry by the end of the day, but there’s still a noticeable layer of colour there. I can’t think of many other products that would offer that level of longevity.
 

What’s not so good?
 

I found the application a little tricky to master at first. The doe-foot applicator delivers a slightly uneven amount of colour as it glides over the lip, so you have to be really precise. Because the colour is so pigmented, any mistakes are noticeable. Now, I’m not normally a fan of lip liner but a very fine line around the outer edge of the lip did seem to help resolve this. I applied a thin layer of the Rouge Edition Velvet Lip Colour in the line, then blended it in with my finger and I think that gave the best effect.
 

Once you’ve practiced this technique a couple of times, it seems to work very well and the pigmentation and longevity are worth the patience and time it requires to achieve a polished look. 

Overall, the Bourjois Rouge Edition Velvet Lip Colour in 08 Grand Cru gets the thumbs up from me and I’m looking forward to experimenting with the rest of my make-up to really show off the gorgeous colour to its best effect.

I picked up my Bourjois Rouge Edition Velvet Lip Colour in 08 Grand Cru from Boots and it was £8.99.

Will you be trying it or do you run a mile from matte lipsticks?

9 September 2014

Dye: Why you should patch test EVERY time

I have very fair eyelashes and eyebrows and I began dyeing them when I was about 15. Every couple of months for four years I temporarily didn’t look like a boiled egg without make-up on. Yay! Then one time things went wrong... 

When I was 19 I went to have my eyelashes dyed at a reputable salon attached to a 4* hotel. Things looked great for the first 24 hours. Then the itching started. Then the redness. Soon my eyes felt like they were on fire. Bloodshot doesn’t even begin to cover it. Think albino-red-eyed rabbit. I looked like I’d been on a marathon crying session for weeks. It took four days for the pain and redness to go away.

Yep, this is what my eyes looked like
Contaminated equipment?

Because I’d used dye so many times before I assumed the salon had used contaminated equipment. It never occurred to me that I may be having an allergic reaction. I called the salon to complain, they assured me they only use clean equipment, offered me a free appointment (which I declined to accept) and that was the end of that. The experience put me off using dye and I relied on mascara and eyebrow pencil to add colour to my facial features from there on in.

Take two 

Until a few years later that is… This time I had my eyebrows dyed at an established salon which had been recommended to me. Again, things looked great at first. 24 hours later my brows started itching. REALLY itching. A few hours later they were bright red. I was in pain. For days afterwards I was left with hideous, itchy scaly crusts where my eyebrows should have been.
 

The penny drops 

At this point I put two and two together and realised that, at some point, for some unknown reason, I had developed an allergic reaction to dye. Suffice to say, I have never coloured my lashes or brows since.
 

Noooo! Not hair dye too? 

When I recently visited a new hair salon to get my light blonde hair dyed a few shades darker, I was surprised to be asked to pop in for a patch test in advance. So many places just don’t bother. (Neither of the salons I went to for the eyelash and brow dye offered me one by the way.) I have my hair highlighted a couple of times a year and have never experienced any problems on my scalp, so I hadn’t expected there to be any issues. 

THANK GOD THEY DID! The next day, the itching started and the spot behind my ear where they’d applied the dye was red raw and painful. I was 5 months pregnant at the time. Had the colour been applied all over my scalp, the result could have been very serious. My stylist was great when I went back in to explain what had happened. She suggested doing another patch test of a lighter shade (which I didn’t react to) and used barrier cream on my scalp before applying the dye as an extra precaution. 

Thanks to patch testing, I didn't experience a reaction to my new hair colour
It’s more common than you think
 

A goth friend of mine used to dye her mousy hair black every six weeks for years. One time though, she was hospitalised after experiencing a severe reaction to the dye. Her face puffed up so badly her own mother didn’t recognise her. NCIS star, Pauly Perrette, was recently rushed to hospital with a similar experience. She posted this picture on her twitter account of the result. Here's another example of a bad reaction on Welsh woman, Carmen Rowe which the Daily Mail reported on back in 2012.

Carmen Rowe's severe reaction to hair dye
Having since done some research into this, it seems that it’s fairly common for people who have used dye – be it on their head, brows or lashes – for years without any problems to all of a sudden develop an allergic reaction. In the worst cases it can lead to anaphylactic shock or even death. The offending ingredient is para-phenylenediamine (PPD) and darker brown and black dyes are much more likely to cause a reaction.
 

What's the answer?

Patch test EVERY TIME. For people who have never experienced a problem with dye, I’m aware that this feels like an unnecessary step. It really isn’t. A reaction can occur at any time, even after years of use.
  • DIY dye-er?
    If you dye your hair, lashes or brows yourself at home, plan ahead. Patch test behind your ear at least 24 hours before applying the dye to your head.
  • Salon dye-er?
    All good salons should offer patch tests before any treatment, but very few actually do. Especially with regular clients. You may have to suggest it yourself and it may be a bit of an inconvenience, but it’s worth taking the time to pay a visit to the salon in advance (at least 24 hours) of your appointment to get a patch test done. 
Of course, the best precaution is to not use dye at all. If that's not an option, lighter shades tend to be less problematic. You could also consider natural alternatives, such as vegetable dyes or henna for your hair, but there are no alternatives for lashes and brows as far as I'm aware.
Symptoms to look out for

Worryingly, more and more stories seem to be emerging of people patch testing and still experiencing a reaction, but I wonder if this is more a case of symptoms not being picked up on rather than them not being there at all. Things to look out for include include redness, inflamed skin and itching.
So what do you think? Will you start getting patch-tested before each dye job? Have you ever experienced an allergic reaction to dye? Leave a comment below and share your experiences.

Allergy UK offer some more useful advice and information about hair dye allergies.